Catalina Security Update 2021-002 broke my Mac

Last night I took the plunge and installed the April 2021 security update to Catalina on my Mac, which didn’t go so well. After several reboots my Mac got stuck on this screen:

Somehow I was able to power cycle the Mac and it seemed to come back and complete the install.
This morning when I tried to boot the Mac, it was continuously wedging with this black screen of death.
The pattern went something like this:

  • Power on Mac
  • Get to FileVault login boot loader
  • After entering the password, change to a black screen with the Apple logo and boot progress bar
  • Get to 60% and then black screen of death
  • Lather, rinse and repeat

Eventually I had the idea to perform a PRAM reset (which reminds me, I must go and disable the startup chime again) and finally my Mac booted normally.

Alas a utility that I use, TotalSpace2 would fail to load because SIP was enabled now.
When I next had a chance to debug the situation, I booted into Recovery Mode and tried to minimally disable SIP so I could get TotalSpaces2 working again using:

csrutil enable --without debug --without fs

This was accepted, I rebooted and **** **** the machine would refuse to boot once more until another PRAM reset.
I decided to try one more time from Recovery Mode:

csrutil disable

… close down terminal window, ask for a reboot and …. hey that worked.
Now I’m pretty sure that before Security Update 2021-002 I was running SIP in the first mode (without debug and fs), however that combination no longer seems to work.

“Patience is bitter, but its fruit is sweet”

I have recently come to appreciate this quote, attributed to the 18th Century French philosopher Jean-Jacques Rousseau.

In my spare time I have been playing about with the Solaris 11 Auto Installer.  Having spent a number of years at Sun debugging jumpstart issues, I wanted to get upto speed on the replacement for jumpstart and started installing client machines.

A basic default manifest install worked fine, then I started experimenting with customising the manifest before then wanting to play with different package groups and wanting to setup a desktop machine, complete with X11 and Gnome.

The manifest was created, along with a profile and also a criteria to narrow the install down to the MAC address of a single machine.   Everything appeared to go well and the installation appeared successful.   I then logged into the machine to reboot this, post install and that’s when something odd happened.
The machine failed to boot from GRUB, going into a GRUB rescue mode:

GRUB loading..
Welcome to GRUB!

error: no such device: 6af2727ec7f5bcd0

Entering rescue mode...
grub rescue>
After wrangling with the issue and attempting to hand craft some GRUB configuration, I gave up and decided to network boot the machine into single user mode and try to debug the issue from there.
The fundamental issue here is that I had previously installed a basic Solaris 11.3 image onto the machine before attempting a desktop install.   As such there was partial GRUB information on the boot sector looking an rpool with the GUID of 6af2727ec7f5bcd0, however as this was a new install the rpool would have been created with a new GUID.
This was reasonably easy to address using:

bootadm install-bootloader -P rpool
Once this command was run and the machine restarted, it started to boot but then went into ‘sysconfig’ mode to ask about the identify of the machine, despite having created a profile which was criteria bound to the machine.
Some time later I tried to restart the install with a view to debugging the problem.   Along the way I got distracted, only to find that when I returned to the machine it had booted up with a nice Solaris Gnome desktop … WTF?
After logging in I reviewed the /var/log/install/install_log file where I discovered the problem … time itself!

Previously I had been logging into the appliance when it got to this stage and then rebooting, whilst under the impression that the auto-reboot wasn’t being honoured:

2017-01-28 12:53:40,488 InstallationLogger.generated-transfer-828-1 INFO Actions: 176798/188933 actions (Installing new actions)
2017-01-28 12:53:58,063 InstallationLogger.generated-transfer-828-1 INFO Actions: 185458/188933 actions (Installing new actions)
2017-01-28 12:54:03,068 InstallationLogger.generated-transfer-828-1 INFO Actions: 185546/188933 actions (Installing new actions)
2017-01-28 12:54:08,126 InstallationLogger.generated-transfer-828-1 INFO Actions: 185626/188933 actions (Installing new actions)
2017-01-28 12:54:13,166 InstallationLogger.generated-transfer-828-1 INFO Actions: 185731/188933 actions (Installing new actions)
2017-01-28 12:54:18,272 InstallationLogger.generated-transfer-828-1 INFO Actions: 185999/188933 actions (Installing new actions)
2017-01-28 12:54:23,275 InstallationLogger.generated-transfer-828-1 INFO Actions: 186544/188933 actions (Installing new actions)
2017-01-28 12:54:28,278 InstallationLogger.generated-transfer-828-1 INFO Actions: 187061/188933 actions (Installing new actions)
2017-01-28 12:54:28,945 InstallationLogger.generated-transfer-828-1 INFO Actions: Completed 188933 actions in 876.97 seconds.
2017-01-28 12:54:29,857 InstallationLogger.generated-transfer-828-1 INFO Done
2017-01-28 12:54:29,910 InstallationLogger.generated-transfer-828-1 INFO Done
2017-01-28 12:54:30,359 InstallationLogger.generated-transfer-828-1 INFO Done
2017-01-28 12:54:50,558 InstallationLogger.generated-transfer-828-1 INFO Done

However given time (where initially I thought the machine wasn’t doing anything),

2017-01-28 13:08:17,616 InstallationLogger.generated-transfer-828-1 INFO Done
2017-01-28 13:08:19,002 InstallationLogger.generated-transfer-828-1 DEBUG Cleaning up
2017-01-28 13:08:19,021 InstallationLogger DEBUG progress: generated-transfer-828-1, reported 100, normalized 2, total=38.120689
PROGRESS REPORT: progress percent:38 generated-transfer-828-1 completed.
2017-01-28 13:08:19,071 InstallationLogger DEBUG Snapshotting DOC to /system/volatile/install_engine.RTUt4d/.data_cache.generated-transfer-828-1-completed
2017-01-28 13:08:19,084 InstallationLogger DEBUG Snapshotting DOC to /system/volatile/install_engine.RTUt4d/.data_cache.initialize-smf
2017-01-28 13:08:19,090 InstallationLogger DEBUG Executing initialize-smf checkpoint
2017-01-28 13:08:19,091 InstallationLogger.initialize-smf DEBUG ICT current task: Creating symlinks to system profile
2017-01-28 13:08:19,110 InstallationLogger.initialize-smf DEBUG Creating a symlink between inetd_generic.xml and /a/etc/svc/profile/inetd_services.xml
2017-01-28 13:08:19,118 InstallationLogger.initialize-smf DEBUG Creating a symlink between ns_dns.xml and /a/etc/svc/profile/name_service.xml
2017-01-28 13:08:19,118 InstallationLogger.initialize-smf DEBUG Creating a symlink between generic_limited_net.xml and /a/etc/svc/profile/generic.xml
2017-01-28 13:08:19,118 InstallationLogger.initialize-smf DEBUG ICT current task: Removing /etc/svc/repository.db
2017-01-28 13:08:19,118 InstallationLogger DEBUG progress: initialize-smf, reported 100, normalized 2, total=39.758620
PROGRESS REPORT: progress percent:40 initialize-smf completed.

 .
 .
 .

2017-01-28 13:08:50,230 InstallationLogger.boot-configuration DEBUG Executing: ['/bin/svcs', '-H', '-o', 'STATE', 'svc:/system/filesystem/root-assembly:net']
2017-01-28 13:08:51,530 InstallationLogger.boot-configuration DEBUG online
2017-01-28 13:08:51,530 InstallationLogger.boot-configuration DEBUG svc:/system/filesystem/root-assembly:net: online
2017-01-28 13:08:51,531 InstallationLogger.boot-configuration DEBUG Executing: ['/bin/svcs', '-H', '-o', 'STATE', 'svc:/system/filesystem/root-assembly:media']
2017-01-28 13:08:51,636 InstallationLogger.boot-configuration DEBUG disabled
2017-01-28 13:08:51,636 InstallationLogger.boot-configuration DEBUG svc:/system/filesystem/root-assembly:media: disabled
2017-01-28 13:08:51,637 InstallationLogger.boot-configuration DEBUG Read GRUB_TITLE from /tmp/.image_info of value 'Oracle Solaris 11.3'
2017-01-28 13:08:51,637 InstallationLogger.boot-configuration DEBUG Setting boot title to image info value: Oracle Solaris 11.3
2017-01-28 13:08:52,770 InstallationLogger.boot-configuration DEBUG Marking 'solaris' as the default boot instance
2017-01-28 13:08:52,770 InstallationLogger.boot-configuration DEBUG Setting title of boot instance 'solaris' to 'Oracle Solaris 11.3'
2017-01-28 13:08:52,783 InstallationLogger DEBUG Executing: ['/usr/sbin/devprop', '-s', 'console']
2017-01-28 13:08:52,810 InstallationLogger.boot-configuration DEBUG No device property value found for console
2017-01-28 13:08:52,810 InstallationLogger DEBUG Executing: ['/usr/sbin/devprop', '-s', 'output-device']

2017-01-28 13:08:52,830 InstallationLogger.boot-configuration DEBUG No device property value found for output-device
2017-01-28 13:08:52,831 InstallationLogger.boot-configuration DEBUG Setting console boot device property to text
2017-01-28 13:08:52,831 InstallationLogger.boot-configuration DEBUG Disabling boot loader graphical splash
2017-01-28 13:08:52,832 InstallationLogger.boot-configuration DEBUG Installing boot loader to devices: ['/dev/rdsk/c1t0d0s1']
2017-01-28 13:08:52,832 InstallationLogger.boot-configuration DEBUG Writing out grub log to /system/volatile/install_grub.log
2017-01-28 13:08:58,187 InstallationLogger.boot-configuration INFO Setting boot devices in firmware

 .
 .
 .

2017-01-28 13:09:40,221 InstallationLogger INFO Automated Installation succeeded.
2017-01-28 13:09:40,271 InstallationLogger DEBUG Transferring log to /a/var/log/install/
2017-01-28 13:09:40,272 InstallationLogger INFO System will be rebooted now
2017-01-28 13:09:40,324 InstallationLogger DEBUG Shutting down Progress Handler

Despite a lack of updates to the log for around 14 minutes, something was working in the background before it then got to the point where some profiles were setup and it installed the GRUB menu and boot loader that clearly were missing in previous attempts, where I’d rebooted too early.

Sometimes those Eureka! moments just come to those who wait.

Slow (initial) ssh logins

I’d been annoyed about a problem when connecting to my NexentaStor appliances over ssh, in that always the initial connection would take a good 20 seconds before I got the password prompt.
Subsequent logins would then run in a reasonable response time, so once that first login of the day had been completed this wouldn’t be an issue … but still, that initial delay really started to bother me.

The traditional way to start debugging such issues is to use the -v switch when invoking ssh and so that’s what I did and discovered we appeared to be waiting here:

debug1: Remote protocol version 2.0, remote software version Sun_SSH_1.5
debug1: no match: Sun_SSH_1.5
debug1: Authenticating to 10.0.0.1:22 as 'root'
debug1: SSH2_MSG_KEXINIT sent

Searching Google for SSH_MSG_KEXINIT and slow ssh logins revealed a number of hits, all of which were wrong for this particular problem.   I tried most of the ideas, including:

  • Removing mdns from the /etc/nsswitch.conf file for the hosts: entry
  • Ensuring client and server could resolve each other in the local /etc/hosts file
  • Reviewing Illumos Bug #1983 (sshd problems)
  • Disabling and unloading the crypto pkcs11_tpm.so module
  • Attempting to prevent reverse DNS lookups

Having exhausted this list and reviewing a bunch of non-Solaris/Illumos based ssh issues, I went back to basics and decided to truss sshd on the appliance after rebooting the appliance and then logging into the console.

# truss -o /tmp/sshd.truss -Dealf -rall -vall -wall -p `pgrep sshd`

Then I attempted the initial ssh from my Mac, got the delay, logged in and then stopped the truss so I could review it.
The truss was huge, much bigger than I’d anticipated, which meant analysing it was going to take much longer than I’d planned.

# ls -lh /tmp/sshd.truss
-rw-r--r-- 1 root root 137M Dec 7 13:21 /tmp/sshd.truss

Frustratingly there were no traces of the ‘SSH2_MSG_KEXINIT’ string (nor any KEX related string), which is probably because these messages are client side, rather than server side debug data.
Using the -D switch turns on time stamp deltas, useful for when you’re searching for a long pause between functions but alas where there were interesting delays between functions, these were uneventful forkx() and vforkx() calls:

# awk '$2 ~ /[0-9]*\.[0-9][0-9][0-9][0-9]/ {print $0}' /tmp/sshd.truss | sort -n -k2 | tail
1305/1: 45.9956 forkx() (returning as child ...) = 1272
1307/1: 46.0128 forkx() (returning as child ...) = 1305
1309/1: 46.0365 vforkx() (returning as child ...) = 1305
1311/1: 46.0539 forkx() (returning as child ...) = 1272
1313/1: 46.6702 forkx() (returning as child ...) = 1272
1315/1: 46.7773 forkx() (returning as child ...) = 1272
1317/1: 46.8037 forkx() (returning as child ...) = 1272
1319/1: 62.3412 forkx() (returning as child ...) = 1272
1321/1: 62.3736 forkx() (returning as child ...) = 1319
1323/1: 62.3934 forkx() (returning as child ...) = 1319

Still as I worked through the code I couldn’t help notice that we seemed to be doing an awful lot of work reading locale files:

1261/1:          0.0001 open("/usr/lib/locale//en_US.UTF-8/LC_CTYPE/LCL_DATA", O_RDONLY) = 5
    ...
1261/1: 0.0002 read(5, 0x0807BC9C, 95232) = 94904
1261/1: R u n e M a g 1 U T F - 8\0\0\0\0\0\0\0\0\0\0\0\0\0\0\0\0\0\0\0
1261/1: \0\0\0\0\0\0\0\0 \0\0\0 \0\0\0 \0\0\0 \0\0\0 \0\0\0 \0\0\0
1261/1: \0\0\0 \0\0\0 \0\0\0 h\0\0\0 (\0\0\0 (\0\0\0 (\0\0\0 (\0\0\0
1261/1: \0\0\0 \0\0\0 \0\0\0 \0\0\0 \0\0\0 \0\0\0 \0\0\0 \0\0\0
1261/1: \0\0\0 \0\0\0 \0\0\0 \0\0\0 \0\0\0 \0\0\0 \0\0\0 \0\0\0
1261/1: \0\0\0 \0\0\0 H80\0\010A0\0\010A0\0\010A0\0\010A0\0\010A0\0\0
    ...
1261/1: A3A7\0\0A2A7\0\0A5A7\0\0A5A7\0\0A4A7\0\0A7A7\0\0A7A7\0\0A6A7\0\0
1261/1: A9A7\0\0A9A7\0\0A8A7\0\0 AFF\0\0 ZFF\0\0 !FF\0\0
1261/1: 0.0054 brk(0x080949D0) = 0
1261/1: 0.0001 brk(0x080B29D0) = 0
1261/1: 0.0005 llseek(5, 0, SEEK_CUR) = 94904
1261/1: 0.0003 close(5) = 0
1261/1: 0.0003 open("/usr/lib/locale//en_US.UTF-8/LC_NUMERIC/LCL_DATA", O_RDONLY) = 5
    .
    .
    .
1261/1:          0.0941 open("/usr/lib/locale//el_CY.UTF-8/LC_CTYPE/LCL_DATA", O_RDONLY) = 7
    ...
1261/1: 0.0074 read(7, 0x080B1AFC, 95232) = 94904
1261/1: R u n e M a g 1 U T F - 8\0\0\0\0\0\0\0\0\0\0\0\0\0\0\0\0\0\0\0
1261/1: \0\0\0\0\0\0\0\0 \0\0\0 \0\0\0 \0\0\0 \0\0\0 \0\0\0 \0\0\0
1261/1: \0\0\0 \0\0\0 \0\0\0 h\0\0\0 (\0\0\0 (\0\0\0 (\0\0\0 (\0\0\0
1261/1: \0\0\0 \0\0\0 \0\0\0 \0\0\0 \0\0\0 \0\0\0 \0\0\0 \0\0\0
1261/1: \0\0\0 \0\0\0 \0\0\0 \0\0\0 \0\0\0 \0\0\0 \0\0\0 \0\0\0
1261/1: \0\0\0 \0\0\0 H80\0\010A0\0\010A0\0\010A0\0\010A0\0\010A0\0\0
1261/1: 10A0\0\010A0\0\010A0\0\010A0\0\010A0\0\010A0\0\010A0\0\010A0\0\0
1261/1: 10A0\0\010A0\0\084A0\0\084A0\0\084A0\0\084A0\0\084A0\0\084A0\0\0
1261/1: 84A0\0\084A0\0\084A0\0\084A0\0\010A0\0\010A0\0\010A0\0\010A0\0\0
    ...

In addition whilst the ssh to the server had been running I also happened to notice that the disk access light was flashing quite heavily.

So just how many locales are installed on this system?

# cd /usr/lib/locale
# ls -1 | wc -l
 223
# locale -a
C
POSIX
af_ZA.UTF-8
ar_AE.UTF-8
ar_BH.UTF-8
ar_DZ.UTF-8
ar_EG.UTF-8
ar_IQ.UTF-8
ar_JO.UTF-8
    .
    .
    .
zh_MO.UTF-8
zh_SG.UTF-8
zh_TW.UTF-8

# find . -type f -print | wc -l
 1342

# grep 'open.*/usr/lib/locale' /tmp/sshd.truss | wc -l
 2787

# dpkg -l | grep -i locale
ii library-perl-5-encode-lo 40-0-3 Determine the locale encoding
ii library-perl-5-gettext-l 40-0-0 Gettext-Locale PERL module
ii locale-af 40-3-3 Afrikaans language support
ii locale-ar 40-3-3 Arabic language support
ii locale-as 40-3-3 Assamese language support
ii locale-az 40-3-3 Azerbaijani language support
ii locale-be 40-3-3 Belarusian language support
ii locale-bg 40-3-3 Bulgarian language support
ii locale-bg-extra 40-3-3 Bulgarian language support extra files
ii locale-bn 40-3-3 Bengali language support
    .
    .
    .
ii locale-zh-sg 40-3-3 Singapore Chinese language support
ii locale-zh-tw 40-3-3 Traditional Chinese language support
ii system-library-iconv-utf 1.0.2 Iconv modules for UTF-8 Locale
ii text-locale 40-3-3 System Localization

Quite a few it turns out … could these be the cause of the initial slow down as we have to read them from disk and subsequently the data is cached in the ARC?
Whilst it’s a good thing there are so many locales available, for my particular requirements I really don’t need so many, so I set about removing ones that I’ll never need.

# dpkg -f locale-vi locale-ur locale-uk locale-ug locale-tr-extra locale-tr locale-th-extra locale-th

(repeat for all non-required locale packages)

After completing this then rebooting the appliance, an ssh to this system completed much much quicker taking just a couple of seconds.


Slow mouse in VMware Fusion and Solaris 11

I’d recently taken the plunge and purchased VMware Fusion 8 for my Mac Pro after many years of using VirtualBox.   It’s not that I’m unhappy with VirtualBox however I’d heard from friends that Fusion was considerably quicker for them.

Migrating the Solaris 11.2 virtual machine from VirtualBox ran into a few issues, where the machine would crash at startup, which had to be fixed by removing the /dev, /devices and /etc/path_to_inst file and directories from the VM, then copying these over from an install ISO.

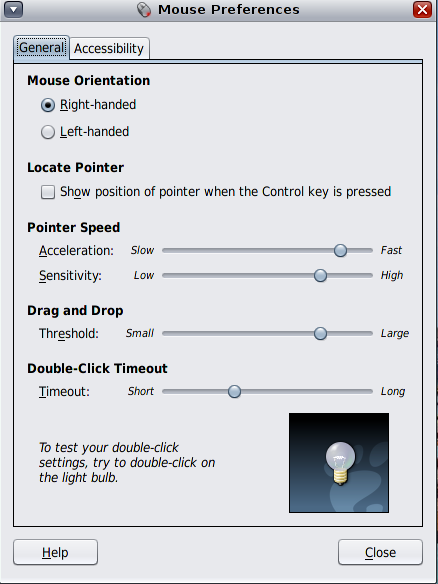
Anyhow after fixing that and installing Fusion guest additions, I noticed the mouse was awfully slow and very laggy.  I tuned this inside the Solaris VM using:

System -> Preferences -> Mouse

mouse-prefs

To try and adjust the acceleration and sensitivity, however this made no difference.

So I turned to the Internet and found that “slow mouse” and “fusion” were reasonably common terms that hit a number of technical documents, including this Knowledge Base document from VMware:

https://kb.vmware.com/selfservice/microsites/search.do?language=en_US&cmd=displayKC&externalId=1007285

It seems the suggestion is to:

  • Switch on “gaming” optimisation and if that doesn’t work
  • Switch off “gaming” optimisation

Needless to say, neither of these actually worked.

Anyhow today I’ve figured out how to fix this, after I read the following document (almost by accident):

https://kb.vmware.com/selfservice/microsites/search.do?language=en_US&cmd=displayKC&externalId=2040498

To quote from that KB document:


To specify the driver in the configuration file:
  1. Verify that VMware Tools are installed in the Solaris 11 virtual machine. For more information, see Installing VMware Tools in a Solaris virtual machine (1023956).
  2. Enter single-user mode in the guest operating system by running the command:

    init S

  3. Generate a new xorg.conf file by running the command:

    Xorg -configure

  4. Copy the newly generated file /root/xorg.conf.new to /etc/X11/xorg.conf:

    cp /root/xorg.conf.new /etc/X11/xorg.conf

  5. Open the file /etc/X11/xorg.conf for editing and modify the Mouse0 InputDevice section. For example:

    Section “InputDevice”
    Identifier “Mouse0”
    Driver “vmmouse”
    EndSection

  6. Open the file /etc/hal/fdi/policy/10osvendor/11-x11-vmmouse.fdi for editing.
  7. Find the line that says:

    <append key=”info.callouts.add” type=”strlist”>hal-probe-vmmouse</append>

  8. Add this line underneath it:

    <merge key=”input.x11_driver” type=”string”>vmmouse</merge>

  9. Reboot the virtual machine.

Now I didn’t bother to create a new xorg.conf file, merely made a backup copy of the existing file that had, mostly been working.  I also didn’t entirely follow section 5 as you can see below:

Section "InputDevice"
        Identifier "Mouse0"
        Driver "vmmouse"
        Option "Protocol" "auto"
#       Option "Device" "/dev/mouse"
        Option "ZAxisMapping" "4 5 6 7"
EndSection

In addition, for section 7 and 8 I modified the input.x11_driver in two places, thus:

<?xml version="1.0" encoding="ISO-8859-1"?>
<deviceinfo version="0.2">
 <device>
 <match key="info.capabilities" contains="input.mouse">
 <match key="input.originating_device" contains="i8042_">
 <append key="info.callouts.add" type="strlist">hal-probe-vmmouse</append>
 <merge key="input.x11_driver" type="string">vmmouse</merge>
 </match>
 <match key="freebsd.driver" contains="psm">
 <append key="info.callouts.add" type="strlist">hal-probe-vmmouse</append>
 <merge key="input.x11_driver" type="string">vmmouse</merge>
 </match>
 </match>
 </device>
</deviceinfo>

Finally after rebooting I did have to go back to this menu:

Preferences -> General -> Gaming

and set this option to “Never optimize mouse for games”

Et-voila!  I now have a working, responsive mouse!

COMSTAR/STMF LUs not available

Tales from STMF land

WARNING

The following description related to a NexentaStor Enterprise system under a support contract, where the customer was entitled to log a support call with Nexenta.
If you are reading this because you have encountered a problem with your NexentaStor iSCSI/STMF service, then you are very welcome to read this document however you are STRONGLY encouraged to log a support call first!
A lot of the details within are carried out below the supported NMV/NMC interfaces and any commands run at the bash level may invalidate your warranty.

Furthermore it is very possible to completely break your STMF configuration, which would require restoring  from a backup (if available) or in extreme cases, having to rebuild the ENTIRE configuration by hand.


When STMF goes wrong

The other day I took an escalation for a customer’s system that had not correctly shared out their iSCSI logical units (LUs) during a cluster failover.  After this was failed back to the primary node and the problem views restored, I needed to figure out what had caused the problem.

A NexentaStor collector bundle was gathered from each node and I started to dig through the logs trying to work out the sequence of events.

It soon became clear that the High Availability RSF-1 cluster code had run into an error:

Operational Status: offline
Config Status     : uninitialized
ALUA Status       : enabled
ALUA Node         : 1
[3037 Feb 12 02:13:24] [pool1 S20zfs] Running map manager restore
[3654 Feb 12 02:13:24] [ESC_ZFS_config_sync rsf-zfs-event] Updating saved cache file: /opt/HAC/RSF-1/etc/volume-cache/asgard.cache-live ==> /opt/HAC/RSF-1/etc/volume-cache/asgard.cache
WARNING: Failed to import LU /dev/zvol/rdsk/asgard/loki: STMF_ERROR_VE_CONFLICT: Adding this view entry is in conflict with one or more existing view entries, errno (9) Bad file number
There are a number of problems that we can see in the above output:
  • The STMF state is offline
  • The STMF configuration is uninitialised
  • When trying to add a view, we get back error STMF_ERROR_VE_CONFLICT

The error code means that we’re trying to add a view to an LU and that a view with the same details already exists, such that we would have a clashing/duplicate entry.
Now in ALUA mode (used with fibre channel) this isn’t so much of a problem because our hosts are either in active or standby mode, so we need to have views ready to go.

The bigger problem here is the fact that not only is STMF offline but we somehow failed to load the configuration.
Looking at the state of the STMF service and then the log file, it was clear something was wrong with the service:

bash# svcs -l svc:/system/stmf:default
maintenance     3:02:23 svc:/system/stmf:default
bash# less /var/svc/log/system-stmf:default.log
...
[ Feb 12 02:08:04 Executing start method ("/lib/svc/method/svc-stmf start"). ]
svc-stmf: Unable to load the configuration. See /var/adm/messages for details
svc-stmf: For information on reverting the stmf:default instance to a previously running configuration see the man page for svccfg(1M)
svc-stmf: After reverting the instance you must clear the service maintenance state. See the man page for svcadm(1M)
[ Feb 12 02:08:04 Method "start" exited with status 1. ]

We can see that the service is in maintenance and that the log file tells us there was a problem loading the configuration, however it doesn’t really explain why or give an error code that we might be able to use to learn more from the source code.
The logs tell us to review the messages file but alas there were again no STMF related errors here either.

What’s required at this point is to augment the STMF service trying to start, so we can determine what error code is coming back.  This is fairly easy to do using truss and modifying the start method for this service:

bash# svccfg -s svc:/system/stmf
svc:/system/stmf> setprop start/exec = "/usr/bin/truss -ulibstmf -ealfo /tmp/svc-stmf.truss -rall -vall -wall /lib/svc/method/svc-stmf start"
svc:/system/stmf> quit
bash# svcadm refresh svc:/system/stmf:default
Kick off a tail of the logfile for this service:
bash# tail -f /var/svc/log/system-stmf:default.log &
Now clear the maintenance status from this service:
bash# svcadm clear svc:/system/stmf:default 

The service went back to maintenance but we had a truss to look at, which showed at the end, this error:
bash# less /tmp/svc-stmf.truss
.
.
.
16041/1@1:      -> libstmf:stmfLoadConfig()
16041/1:        open("/etc/svc/volatile/repository_door", O_RDONLY) = 3
16041/1:        getpid()                                        = 16041 [16040]
16041/1:        door_call(3, 0x0803B240)                        = 0
16041/1:                data_ptr=803B260 data_size=4
16041/1:                desc_ptr=0x803B278 desc_num=1
16041/1:                rbuf=0x803B260 rsize=256
16041/1:        close(3)                                        = 0
     .
     .
     .
16041/1:        ioctl(3, _IORN(0x0, 18, 0), 0x0803B400)         = 0
                read 0 bytes
16041/1:        ioctl(3, _IORN(0x0, 18, 0), 0x0803B400)         Err#149 EALREADY
                read 0 bytes
16041/1:        close(3)                                        = 0
16041/1@1:      <- libstmf:stmfLoadConfig() = 32782

Error code 32782 is not seen in the source code, however I’ve been looking at Solaris and Illumos based systems for too many years and I know that we tend to define most of these as hexadecimal numbers, whereas truss is giving us the decimal conversion. So just what is that in hex?

$ bc
bc 1.06
Copyright 1991-1994, 1997, 1998, 2000 Free Software Foundation, Inc.
This is free software with ABSOLUTELY NO WARRANTY.
For details type `warranty'. 
obase=16
32782
800E

And this number is definitely found in the source code, here:

64#define	STMF_STATUS_ERROR	    0x8000
78#define	STMF_ERROR_VE_CONFLICT		(STMF_STATUS_ERROR | 0x0e)


For those of you who are eagle eyed, you’ll have noticed this is the same error we saw during the view restore section in the cluster logs.

This is pretty profound – it’s not just cluster having a problem trying to add a view that’s a duplicate, it’s that as the STMF service is attempting to start it already has a clashing view and that is preventing the service from coming online *and* why the configuration remains uninitialised.
So how do we determine the duplicate view in the STMF configuration?
Where is the STMF configuration held anyhow?
Let’s tackle the second question first – the STMF configuration is held in the SMF repository, so we can extract it using the following command:
bash# svccfg export -a svc:/system/stmf > /var/tmp/stmf.export.xml
Now let’s go back to the first question – how do we determine the duplicate view in the configuration?
So what makes a view unique?
It’s the combination of the LU + Host Group + Target Group details when you run the stmfadm command or call into the kernel using the libstmf library that determine whether there’s a clash.   Knowing this means we can review the STMF configuration file.
The trouble is, this is a little more tricky than the description suggests as the configuration dump is all in XML and in this particular case there were over 8000 lines of XML to review, consisting of over 100 LUs and nearly 1000 views, which look something like this:
 <property_group name='view_entry-6-600144F0DEA04F0000005501BF0E0085' type='application'>
 <propval name='all_hosts' type='boolean' value='false'/>
 <propval name='all_targets' type='boolean' value='false'/>
 <propval name='host_group' type='ustring' value='artists'/>
 <propval name='lu_nbr' type='opaque' value='008a000000000000'/>
 <propval name='target_group' type='ustring' value='FC_Users'/>
 </property_group>
The fact of the matter is, there’s no way we could do this manually by visual inspection unless we’re dealing with the most simplest of configurations with a minimal amount of LUs and views.
So I wrote some perl to parse the XML data which did the following:
#
# Walk through the XML data, searching for the property group view_entry lines only.
# When we find an entry, extract the lu and view number, then move on to the HG and TG
# lines in the data.
#
# As we’re using an associative array we can use the LU, TG and HG (minus the view number)
# as a unique index into the array, storing the view number as the value.
# If we used the view number as part of the searchable key, nothing would ever clash.
#
# Once we’ve constructed the viewline, push that string as a key into the array with the
# view number as the value.
#
# Finally all we now need to do is check if the value exists in the array – if not, push
# the value, otherwise we’ve found a clash.
#
(The full script can be found as the stmf-xcheck.pl URL at the end of the page.)
When this was run on the XML configuration file, it revealed:
bash$ ./stmf-xcheck.pl /var/tmp/stmf.export.xml
Searching for duplicate views in manifest
If any duplicates are found, they will appear as - LU : HG : TG

600144F0DEA04F000000544E94060027:artists:FC_Users - view entry 8 clashes with entry 7
600144F0DEA04F00000054628EF9004C:renderfarm:FC_Users - view entry 8 clashes with entry 0
Now armed with this knowledge it was a relatively simple case of manually manipulating the STMF configuration in the SMF repository:
bash# svccfg -s stmf
svc:/system/stmf> setprop lu-600144F0DEA04F000000544E94060027/ve_cnt = 8
svc:/system/stmf> delprop lu-600144F0DEA04F000000544E94060027/view_entry-8-600144F0DEA04F000000544E94060027
svc:/system/stmf> delpg view_entry-8-600144F0DEA04F000000544E94060027
svc:/system/stmf> setprop lu-600144F0DEA04F00000054628EF9004C/ve_cnt = 7
svc:/system/stmf> delprop lu-600144F0DEA04F00000054628EF9004C/view_entry-8-600144F0DEA04F00000054628EF9004C
svc:/system/stmf> delpg view_entry-8-600144F0DEA04F00000054628EF9004C
svc:/system/stmf> quit
bash# svcadm clear stmf
bash# svcs stmf
STATE          STIME    FMRI
online          8:27:46 svc:/system/stmf:default
bash# stmfadm list-state
Operational Status: online
Config Status     : initialized
ALUA Status       : enabled
ALUA Node         : 0
At this point the service then came online and the STMF state looked much healthier.
Oh I should point out that we needed to restore the STMF start method back to it’s default, non-augmented state:

bash# svccfg -s svc:/system/stmf
svc:/system/stmf> setprop start/exec = "/lib/svc/method/svc-stmf start"
svc:/system/stmf> quit
bash# svcadm refresh svc:/system/stmf:default
And there you go, a repaired STMF service.
As mentioned at the beginning of this post, you should not attempt this procedure on a supported system without first contacting Nexenta support.
If you’ve run into a similar situation on a Solaris system, then again your first port of call should be to log a call with with Oracle support and get their assistance.
The same advice holds true for any Illumos based distribution where you have a support contract – call the support desk first, but by all means feel free to reference this blog posting.

Glossary

iSCSI is an acronym for Internet SCSI (Small Computer System Interface), an Internet Protocol (IP)-based storage networking standard for linking data storage subsystems.

By carrying SCSI commands over IP networks, the iSCSI protocol enables you to access block devices from across the network as if they were connected to the local system. COMSTAR provides an easier way to manage these iSCSI target devices.

COMSTAR utilizes a SCSI Target Mode Framework (STMF) to manage target storage devices.

STMF cross check source code

My system won’t boot

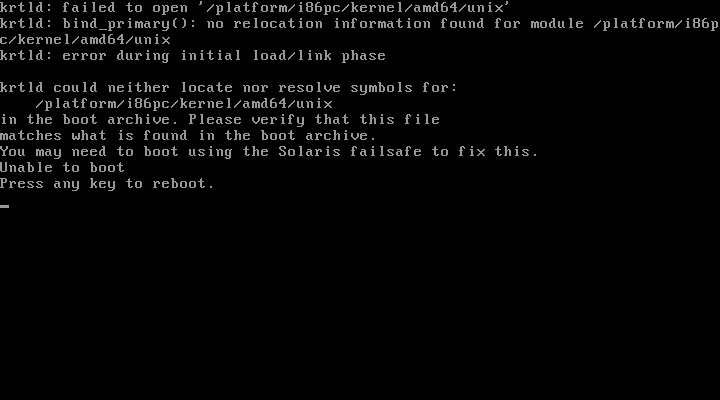
The other day I encountered a problem where a machine had a fairly fatal error when trying to boot up, with this error:

krtld: failed to open '/platform/i86pc/kernel/amd64/unix'
krtld: bind_primary(): no relocation information found for module /platform/i86pc/kernel/amd64/unix
krtld: error during initial load/link phase

or as can be more fully seen in the screen shot:

krtld_boot

After rebooting and selecting safe mode from the GRUB menu I then imported the syspool and mounted up the current boot image filesystem:

# zpool import -f syspool
# zpool get bootfs syspool
NAME     PROPERTY  VALUE                   SOURCE
syspool  bootfs    syspool/rootfs-nmu-000  local
# mount -F zfs syspool/rootfs-nmu-000 /mnt

At this point I needed to inspect the boot_archive file as instructed, which is fairly easily done thus:

# mkdir /a
# cd /mnt/platform/i86pc/amd64
# lofiadm -a `pwd`/boot_archive
/dev/lofi/1
# mount -F hsfs /dev/lofi/1 /a
# cd /a
# ls
boot    etc     kernel

Walking through the boot_archive image I observed that we had no platform directory – so no wonder the machine couldn’t find the unix kernel file.
At this point I assumed the boot_archive file was somehow corrupt and as per so many documents, decided to rebuild the archive using bootadm:

# bootadm update-archive -R /mnt
updating //platform/i86pc/boot_archive
updating //platform/i86pc/amd64/boot_archive

After this, I unmounted /a, destroyed the lofi device, unmounted /mnt and exported the syspool before rebooting, only to find the exact same error.
At this point I got the machine booted once more from failsafe and decided to check the location of the unix file for a 64 bit kernel:

# ls -l /mnt/platform/i86pc/kernel/amd64/unix
-rwxr-xr-x 1 root sys 1903080 Sep 9 02:09 /platform/i86pc/kernel/amd64/unix

Hmm, this file does exist so why doesn’t it get copied into the boot_archive file?
After poking at this for a while and trying to read up on the process of boot archive creation, I eventually turned to the source and started seeing references to a cache directory, which turned out to be the archive_cache directory here:

/platform/i86pc/archive_cache
/platform/i86pc/amd64/archive_cache

Upon checking these directories it turned out that the platform sub-directory had been removed, thus any attempt to rebuild the boot_archive file was doomed to failure.
There’s very little documentation about the archive_cache and even less about fixing it when it’s corrupt – there’s nothing in the man page.
Trying to be clever I took a copy of the platform directory from a similarly configured machine, copied that over to the 32bit and 64bit archive_cache directories, then rebuilt the boot_archive file again.

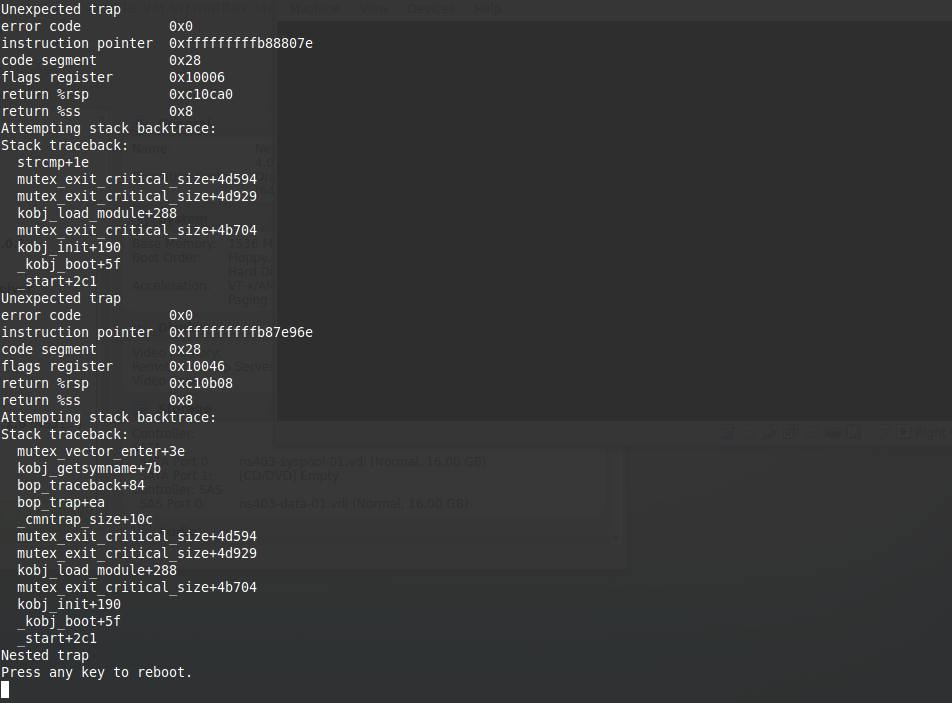
Upon rebooting the machine this time, I got this error:

boot_corruption


Alas this just goes to show that not all machines are identical and when you’re dealing with the kernel and dynamic kernel modules, everything has to be exactly right.
At this point I also tried being clever and thought that if I deleted the archive_cache directories, then created an empty archive_cache directory with the same permissions, that bootadm would find nothing in the cache and repopulate it?

Apparently not – if you do this you end up with a small boot_archive file and nothing in the archive_cache.  This was me trying to outthink the software when in reality I was being too smart.

Pudding-Brains-640x640

It turns out that if you delete the archive_cache directories completely, then bootadm will notice this, recreate the directory for you and then create a valid boot_archive file.

# bootadm update-archive -v
archive cache directory not found: //platform/i86pc/archive_cache
archive cache directory not found: //platform/i86pc/amd64/archive_cache
 new /boot/acpi/tables
 new /boot/solaris/bootenv.rc
need to create directory path for //platform/i86pc/archive_cache/boot/solaris
need to create directory path for //platform/i86pc/amd64/archive_cache/boot/solaris
 new /boot/solaris/devicedb/master
need to create directory path for //platform/i86pc/archive_cache/boot/solaris/devicedb
need to create directory path for //platform/i86pc/amd64/archive_cache/boot/solaris/devicedb
cannot find: /etc/cluster/nodeid: No such file or directory
 new /etc/dacf.conf
need to create directory path for //platform/i86pc/archive_cache/etc
need to create directory path for //platform/i86pc/amd64/archive_cache/etc
 new /etc/devices/devid_cache
need to create directory path for //platform/i86pc/archive_cache/etc/devices
need to create directory path for //platform/i86pc/amd64/archive_cache/etc/devices
cannot find: /etc/devices/mdi_ib_cache: No such file or directory
 new /etc/devices/mdi_scsi_vhci_cache
cannot find: /etc/devices/retire_store: No such file or directory
 new /etc/devices/pci_unitaddr_persistent
 new /etc/driver_aliases
 new /etc/driver_classes
 new /etc/mach
 new /etc/name_to_major
 new /etc/name_to_sysnum
.
.
.
 new /platform/i86pc/kernel/amd64/unix
 new /platform/i86pc/kernel/unix
.
.
.
 new /platform/i86pc/ucode/AuthenticAMD/3010-00
 new /etc/zfs/zpool.cache
need to create directory path for //platform/i86pc/archive_cache/etc/zfs
need to create directory path for //platform/i86pc/amd64/archive_cache/etc/zfs
updating //platform/i86pc/boot_archive
Unable to extend //platform/i86pc/boot_archive... rebuilding archive
Successfully created //platform/i86pc/boot_archive
updating //platform/i86pc/amd64/boot_archive
Unable to extend //platform/i86pc/amd64/boot_archive... rebuilding archive
Successfully created //platform/i86pc/amd64/boot_archive

Upon creation of the new boot_archive, I rebooted and the system came up normally.


Intel SASUC8I host bus adaptor (HBA)

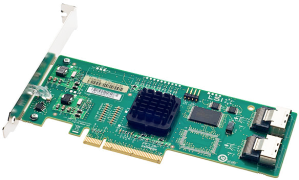
As I mentioned in the previous posting, the Intel SASUC8I is an excellent HBA for attaching both SAS and SATA disks.  The card is a vendor rebranded LSI SAS 3081-E which means you can obtain firmware for it from the LSI homepage, here:

http://www.lsi.com/products/storagecomponents/Pages/LSISAS3081E-R.aspx

When I purchased my Intel SASUC8I it came with the following firmware and BIOS:

MPTFW-01.26.00.00-IE
MPTBIOS-6.24.00.00 (2008.07.01)

The card worked just fine but after a bit of research I noticed the LSI were offering an updated version:

MPTFW-01.33.00.00-IE
MPTBIOS-6.36.00.00 (2011.08.24)

As you can see, some 3 years worth of updates and fixes, so usually a worth while update and by the looks of it, possibly the last update for this card.

At this point I’m going to say that whilst I encountered no problems with this procedure and that my HBA came back fine after the flash update, I should advise that you’re probably going to void any warranty you might have on that card (assuming it’s fairly new and shiney).

FLASH UPDATE THE HBA AT YOUR OWN RISK !

Still with me?  After downloading the DOS/Windows package from the LSI site, I attempted to use the DOS utility to flash my card but it just wouldn’t run from the DOS environment I’d created.

I noticed LSI offered a Linux zip file, so I downloaded this, created a bootable Linux Mint image, put the LSI firmware and flash utility on that USB stick and set about booting and then flashing the firmware on this HBA using their sasflash utility.

As others have discovered and quite logically, the sasflash command won’t (initially) let you flash the Intel SASUC8I card with non-Intel branded firmware.  It makes sense for Intel to do their own quality control and testing, releasing firmware they believe has passed their own Q&A, however when you’re three years behind the current version it can suck a little.

Fortunately the sasflash utility has a -o switch (expert mode) that allows you to override the vendor/brand check and go ahead (at your own risk) to flash the firmware and BIOS in the card to the LSI branded version.

You’ll need to ensure you use the right version of the firmware as there are different hardware versions of this particular card (B1, B2, B3).  If you don’t know which version you’re using, download the LSI Util package from the LSI web site and then run up the tool. On NexentaStor and Solaris x64 this looks like:

# lsiutil

LSI Logic MPT Configuration Utility, Version 1.63, June 4, 2009
1 MPT Port found

     Port Name   Chip Vendor/Type/Rev    MPT Rev  Firmware Rev IOC
 1.  mpt0        LSI Logic SAS1068E B3     105      01210000    0

As you can see this is a revision B3 board, so I needed to use the 3081ETB3.fw firmware file, using the following command:

# sasflash -o -f 3081ETB3.fw -b mptsas.rom

If you perform this you’ll see something like:

Product ID and Vendor ID do not match.
Would you like to flash anyway (y/n)?

Just go ahead and answer yes to the question to get yourself on the latest LSI firmware so you can proactively rule out any known issues.

My little ZFS NAS lab box

Building a ZFS machine

Back in the day, when I worked at Sun Microsystems, they had the most incredible lab – full of every type of machine, storage array and funky device that Sun manufactured.

In the UK these were maintained by an amazing set of guys headed up by Paul Humphreys and no job was too much for them to tackle, from setting up entire solutions of servers connected via switches to storage arrays (log ticket, let me know when it’s all hooked up) to just simple requests looking for a specific type of server.
When Sun UK were still based at Guillemont Park, the lab took up a huge section of the ground floor for one of the main buildings and it was quite a sight to behold and to hear (thank goodness for the mandatory ear protectors).

I remember my primary ZFS lab box used to be an X4500 because it had lots and lots of disks, thus I could be testing multiple different customer problems on this single piece of hardware, thus reducing the number of lab boxes I had booked.
It was a fantastic box (once those Marvell SATA controller bugs were fixed) and I was exceptionally sad to give up my booking when I left Snoracle.

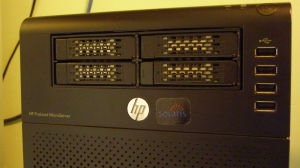
The Mini (me) X4500

P1030357

Now that I work from home it would be difficult to own an X4500 / X4540 or variant thereof, frankly the noise in my office would be a complete nightmare and the power consumption would be a little worrying.  Sure it’d keep me warm during the winter but my Mac Pro does a pretty good job there.
Therefore I went about looking for a machine that could be used as a SOHO ZFS lab box.  The requirements were:

  • It had to be quiet
  • It had to have a small footprint
  • The power consumption had to be reasonable (no getting an electrician in for a new 3 phase power supply)
  • It had to have 4 drive bays (one boot drive, three free for playing with various zpool configs)
  • It had to be reasonably inexpensive
  • The driver support had to work for Solaris / Nexenta / Illumos variants

After some research I settled upon an HP Proliant Microserver N40L as it ticked all these boxes and then some!
The other thing going for the HP N40L was a £100 cashback offer, which certainly helped fund the memory upgrade to 8GB because we all know ZFS likes memory, lots of memory.
HP seem to do this on a regular basis, so right now I see Ebuyer are offering the replacement machine, the ProLiant N54L for £209.99 with £100 cash back, which seems like quite a bargain.

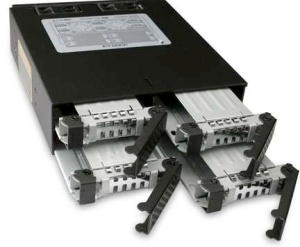
I discovered that not only could I populate this machine with 4 x SATA drives in the front bay but various clever people had purchased a 5.25″ drive bay to sit in the empty slot that would have been taken up by the DVD drive (if you’d configured that as an extra option) and then hooked that up to a SATA or SAS PCI Express HBA.

At the time I remember there were two options – a 6 slot (MB996SP-6SB) or a 4 slot Icy Dock drive cage (MB994SP-4S).  I was initially tempted to buy the 6 slot device but the more I thought about this, the more I got worried that there would be insufficient power to drive 6 disks, either HDD or SSD or a combination of the both.
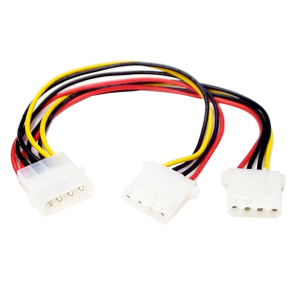
The dock takes two molex connectors to provide power to the disks and there’s just a single molex power connector inside the HP designed to power the DVD drive, which would mean buying a splitter cable.
Then there’s the matter of squeezing 6 disks into such a small space – any disks purchased would have to be very low profile, otherwise they just wouldn’t fit!

icy dock mb994sp4s

Once I’d given it some thought I figured the 4 slot Icy Dock sounded like the best option, mainly due to the worry over power draw.  After all I wouldn’t be the first person to experience pool corruption due to power problems, as my friend Andy Harrison found out:

http://www.stormsail.com/zfs-fun-and-games/

Having selected my 4 drive bay dock I then had the job of figuring out which drives to buy and how to connect this up so they’d be seen to the system.
The Icy Dock is both SATA and SAS compatible which gave me an interesting choice – buy a SAS HBA at a higher cost or a SATA HBA which would be much cheaper.

Of course hardware is nothing without the drivers and this was an interesting sticking point.  SATA controllers come and go, chipsets come and go which means trying to buy an established card with good driver support (hoping the card is still readily available) or buy a newer card and hope the driver works.

On the other hand because Solaris and its derivatives have an Enterprise background, the SAS support is much better and when you think SAS, invariably you think of LSI controllers.
There is a problem with this approach though – LSI cards tend to be expensive and only available from more specialist dealers.

After a lot of research I found the Intel sasuc8i card, which is a rebadged LSI HBA with the 1068 chipset and been supported in Solaris for a number of years.  Also going in its favour was the fact that I could pick one up online for about £130, considerably cheaper than the currently available LSI badged cards.
You can also install the current LSI firmware on the card (with a little bit of a kick) thus ensuring you don’t have to wait for Intel to push out updates.

Having sorted out the drive dock and a SAS HBA this just left:

  • A Startech 50cm SAS cable to 4x latching SATA ()
  • A Molex 4 pin, Y shaped power splitter cable
  • 2 x 500GB Samsung Spinpoint M8 disks
  • A USB Samsung SE-208 DVD drive (for O/S installation)

intel_sasuc8i sata_cable molex

After waiting for all the parts to arrive it was time to fit the Icy Dock, disks, HBA and cables.  The thing about the Microserver is that it’s a really compact machine, so fitting the HBA is fiddly – it helps to have small hands.  Thankfully my wife is always up for a challenge and got stuck in, disconnecting the various plugs on the motherboard, sliding out the motherboard and fitting the card.

The 4 way SAS/SATA cable proved to be tricky.  After attaching this to the Intel sasuc8i card and hooking it up to the Icy Dock, I found that the Samsung disk wasn’t recognised.
The machine was powered off and my wife double checked the cables, only to find that you have to give the SAS/SATA cable a really, really good push to insert into the HBA and get a solid connection.

One boot up later and the disk was still not recognised by the HBA during the probe/discovery phase.  At this point I figured I would try the other disk I’d purchased and after screwing this into the caddy and powering up again, success we had a disk that could be seen.
This meant either a DOA disk or a bad connection.  Moving the disk to the other slots proved they were fine and putting the suspect disk into a USB caddy proved it couldn’t be seen on my Mac, so it was back to the vendor a replacement.

Once the hardware was seen it was time to burn a NexentaStor DVD, hook up the Samsung DVD drive and then boot and install the software on the internal 250GB SATA drive and create a mirrored data pool on my two 500GB Samsung Spinpoint drives.

I’ll leave the details on this for another post.

Upgrading from Solaris 11 GA to Solaris 11.1 GA (aka update 1)

I run a Solaris 11 virtualbox guest and was very excited to see that Oracle had released their first generally available update to this, almost one year since Solaris 11 first shipped.

There’s an excellent article on how to upgrade using the release publisher, given here:

http://www.oracle.com/technetwork/articles/servers-storage-admin/howto-update-11dot1-ips-1866781.html

I just followed the instructions in that document and all went swimmingly well.

Thanks Pete.

Xorg and the case of the mysterious xorg.conf.vesa config

I recently took delivery of a new Lenovo T420 laptop for my new job at Nexenta.

The plan was/is to run a variant of Solaris/Illumos on the machine and having worked at Sun Microsystems for 12 years, I knew it would be good to get something with an NVIDIA chipset to drive the Xorg server (having suffered awful and frequent crashes with the Intel i915 driver).

I tried the current (151a) build of OpenIndiana and it refused to install, so back to Solaris 11 and this installed fairly comfortably – except that after installation X came up in the cruddy old vesa mode and seemed to be using the xorg.conf.vesa file.
I knew this because when I grepped for Xorg I could see a -config xorg.conf.vesa file being passed in as an argument, which made sense when the installer was running but now? Can I have something a bit more modern please?

Various documentation suggested all I needed to do was to run nvidia-xconfig
and it would generate me a file in /etc/X11 as xorg.conf, so I did, it did and then I restarted Xorg only to find it was still wanting the vesa config file.  Right, time to roll up the sleeves!

Using ptree I noticed that gdm-binary called gdm-simple-slave which in turn called Xorg with the following arguments:

/usr/bin/Xorg :0 -nolisten tcp -config xorg.conf.vesa ...

Why was it not picking up the blasted /etc/X11/xorg.conf file and defaulting to the vesa version?  More importantly where was this set so I could change it?  The start method for svc:/application/graphical-login/gdm:default might give me an idea:

# svcprop -p start/exec svc:/application/graphical-login/gdm
/lib/svc/method/svc-gdm\ start

Looking at the start method showed a variety of properties under gdm/args such as –fatal-warnings but these were gdm specific and not for Xorg.
Back to Google and I eventually found the following PSARC 2010/161 http://arc.opensolaris.org/caselog/PSARC/2010/161/mail

This PSARC seemed to have the answer right there in front of me:

1) Xorg -config xorg.conf.vesa

   When Xorg is called directly, using the command line flag
   "-config xorg.conf.vesa" will cause it to start with the
   VESA driver.

2) svc:/application/x11/x11-server property options/config_file

   When the SMF property options/config_file is set to a string value,
   that string will be passed as the -config argument to the X server
   when started via one of the mechanisms that uses the /usr/bin/X or
   /usr/bin/Xserver commands to start the X server with the options
   specified in SMF.   This allows passing this option when the X server
   is started indirectly, such as via the gdm display manager.

However I could not find an x11/server SMF service, even though there’s an x11-server.xml manifest in /lib/svc/manifest/application/x11 and even more annoying the damned thing won’t import, giving me a message along the lines of having to restart svc:/system/manifest-import.

Eventually I went old school to track this down by running a strings on the SMF repository database to find that config_file was being set from a site profile in /etc/svc/profile/site which had a file called x11_vesa.xml which looked like:

<?xml version='1.0'?>
<!DOCTYPE service_bundle SYSTEM '/usr/share/lib/xml/dtd/service_bundle.dtd.1'>
<!--
    Service profile generated by installer to configure X to use the VESA driver
-->
<service_bundle type='profile' name='x11_vesa'
         xmlns:xi='http://www.w3.org/2003/XInclude' >
  <service name='application/x11/x11-server' version='1' type='service'>
    <property_group name="options" type="application">
      <propval name="config_file" type="astring" value="xorg.conf.vesa"/>
    </property_group>
  </service>
</service_bundle>

Eureka! I’d found it!
One swift move of this file to a safe location and a restart of Xorg later, the system picked up the NVIDIA driver for Xorg via gdm and I could start to play with different resolutions and even setting up a dual head configuration.